
Alright. After not just one but 2 (!) quasi scientific / philosophical posts about the concept of an entirely superfluous weather station (overkill), lets get into the actual meat of it.
Lets look at the hardware and sensors that need to live outside. I decided that I needed temperature, humidity and barometric pressure as bare minimum. I really wanted wind speed, wind direction and gust levels. I read about other weather stations having UV monitoring but considering that I would have it underneath trees, I didn’t think there would be much worthwhile data.
So, as sensors, we have a DHT-22 (temp, humidity) and a BMP180 and a Sparkfun Wind speed and direction, gusts, rain gauge. The DHT22 and the BMP180 are very well documented and supported, many, many examples exist of them being integrated into Arduino projects. The Sparkfun wind speed and rain sensors are a little less well documented and functionally a little bit more complicated as well. All sensors are connected to an Arduino Uno and – eventually – housed in a Home Depot electrical junction Box. In the photo below, you see the assembly before attempting to tighten the cables and you also see the black antenna cable that connects to the XBee radio. That cable by the way lives inside the junction box because I didn’t trust it to survive outside. This is far from ideal but it does work. I’ll write later about the entire wireless hook up.
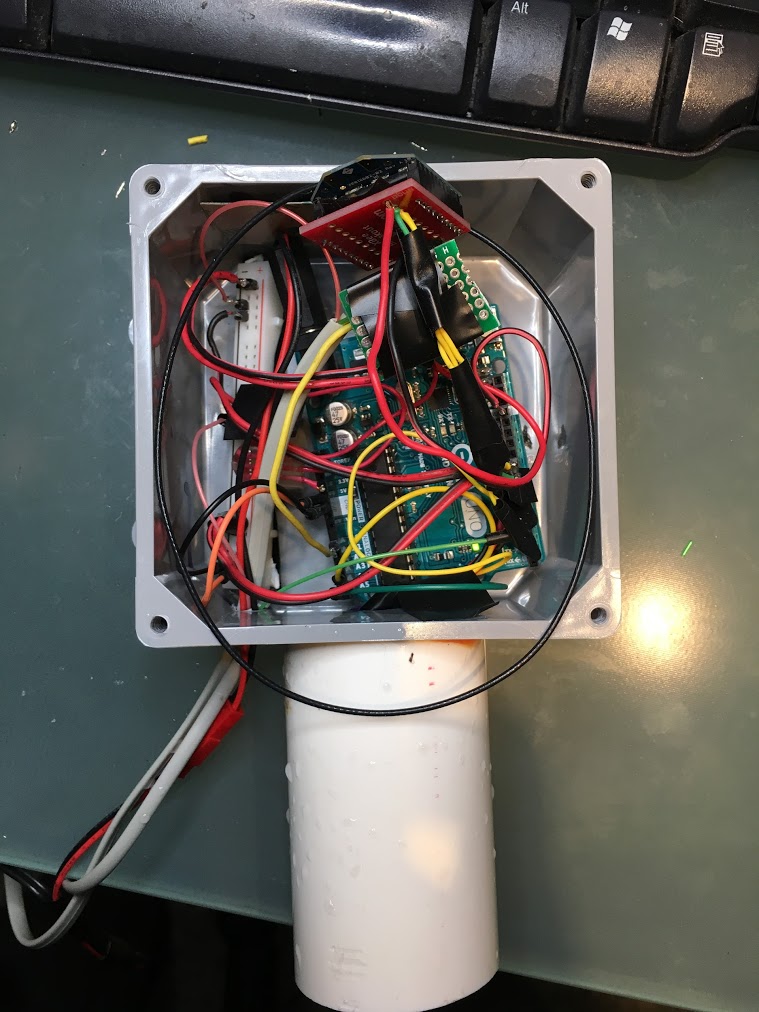
A couple of comments about the box. I realized that the weather station would have to be on the roof of the house and relatively difficult to reach so I put quite a bit of thought into the box itself. It had to be as watertight as possible, resist burrowing critters, rust, leaves falling, heat up over +40 C and below -20 C. A standard electric junction box from Home Depot does just that. I drilled 2 holes, one on the left for power supply and the wind/rain sensor cables. A second hole allowed me to connect the DHT22 and the BMP180 and place them on the outside of the junction box. That in turn means I can more or less seal off the main electronics compartment and keep the Arduino relatively safe.
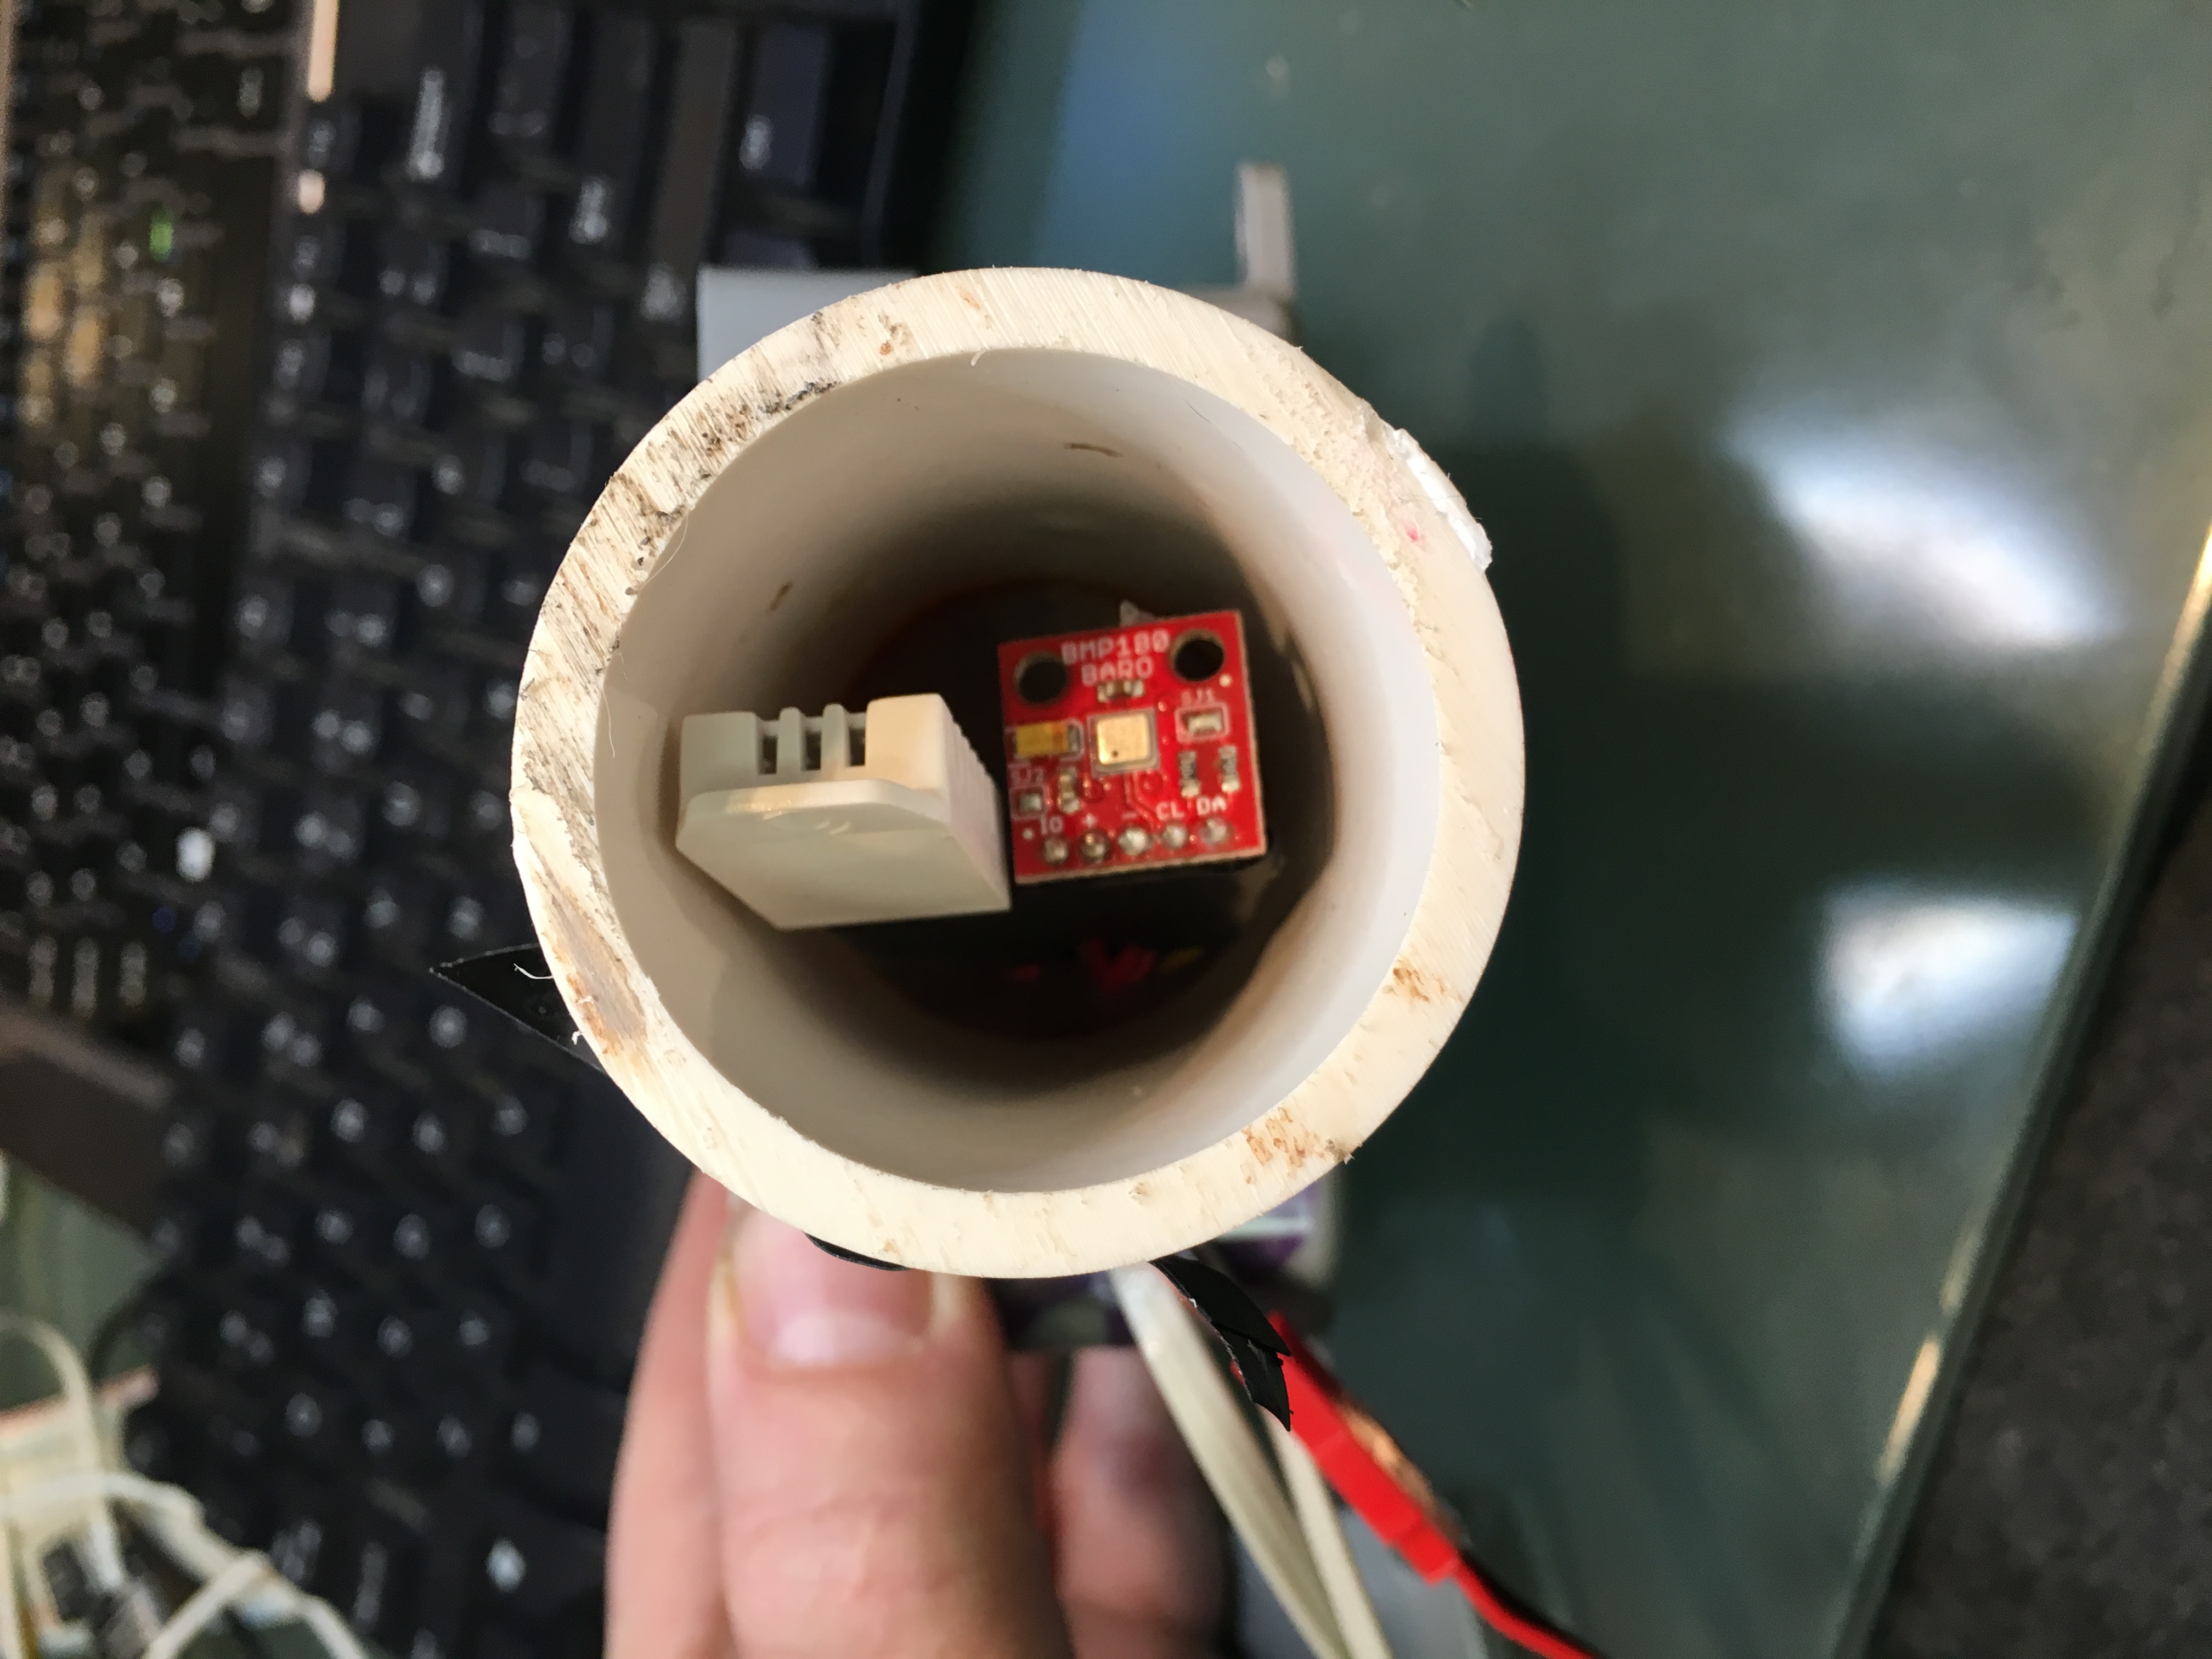
To protect the dangling sensors, I took some left-over PVC piping and glued it to the box with standard plumbing glue . I used little scraps of duct take to secure the pins to a couple of crudely-cut breakout boards since I didn’t want to solder the sensors themselves. I did this mainly so that I can swap the sensors out if they are damaged for example. This connection is definitely a weak point and I am keeping an eye on it. Not happy but it works for now.
Lastly, and not shown in the picture, I covered the bottom end of the PVC pipe with a layer of wire mesh. You can buy the little patches of mesh at home depot as well, generally used to repair screen windows and doors. Basically, where we live, if a critter can get in, it will and the screen should prevent this. In the end, turn the entire assembly upside down and mount on the side of the chimney.
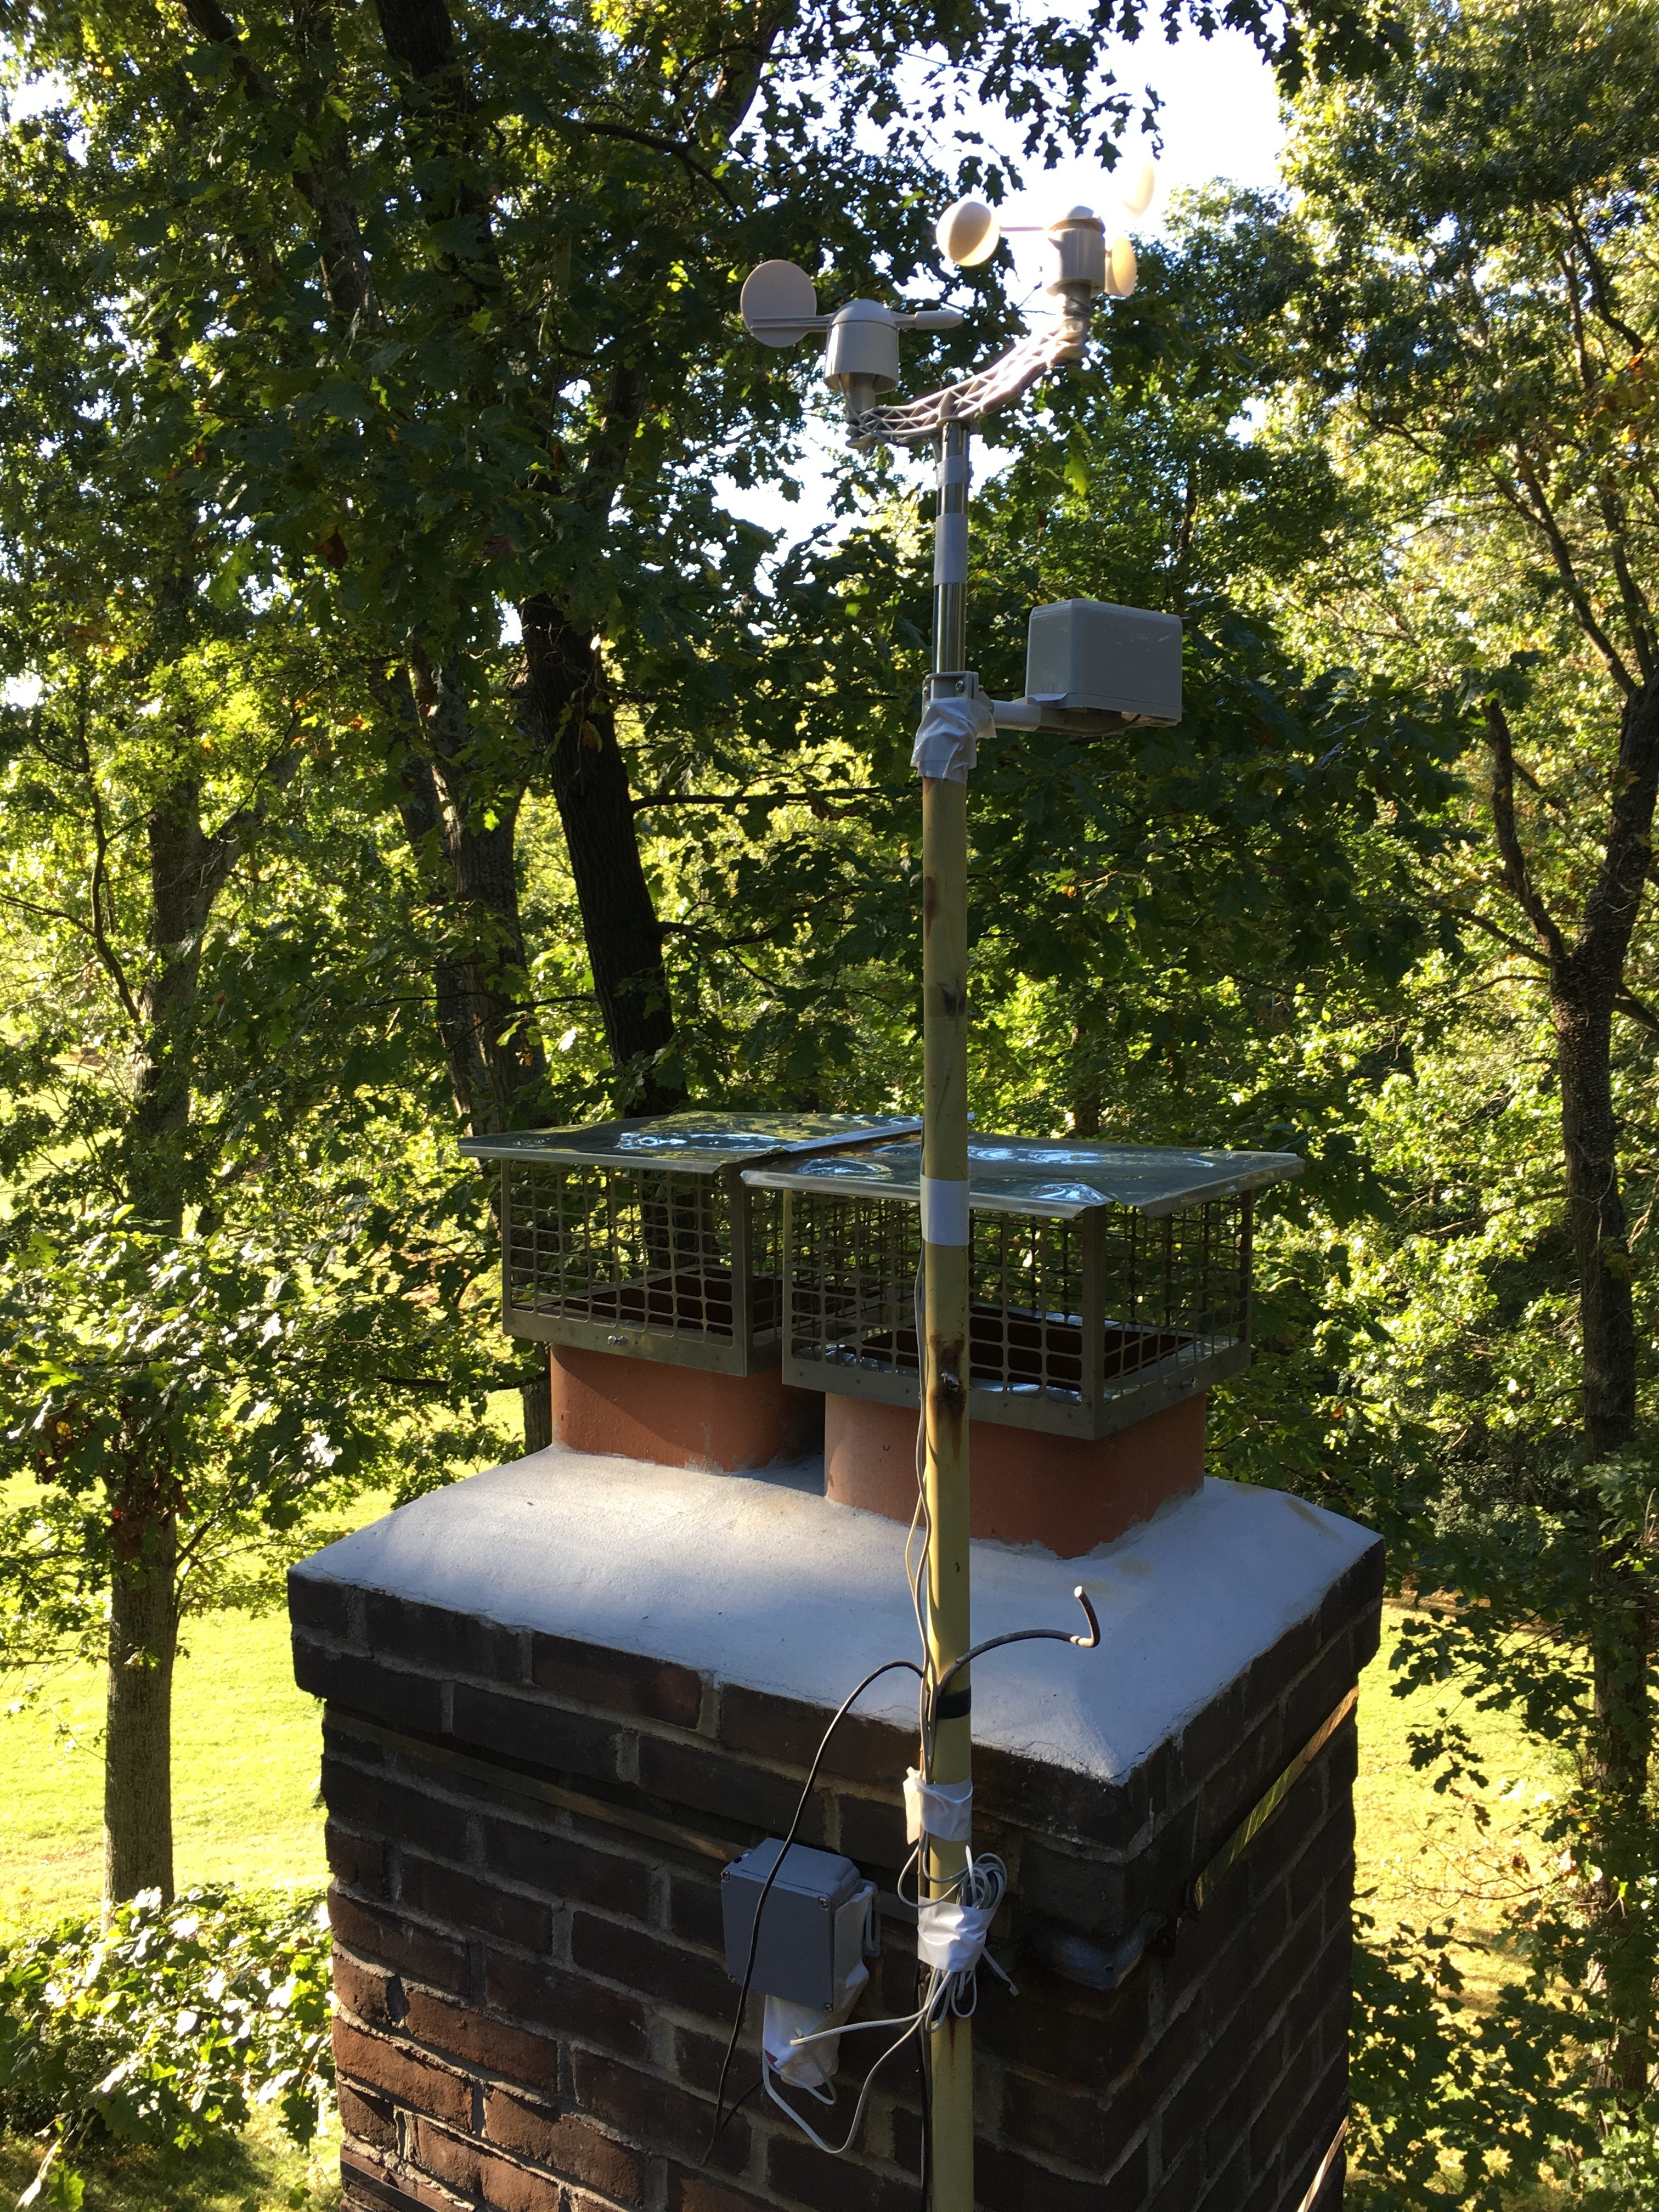
From the photo above, one can see the whole assembly. The white PVC tube that contains the humidity, temperature and barometric pressure sensor points downward and air flows past it freely. It is nearly always in the shade and about as easily accessible as anything can be on a roof. The anemometer, wind vane and rain gauge are installed on an old VHF antenna pole. Its not as high as I want but the whole assembly is rock-solid. One issue may come up in the winter when I fire up the wood burning stove. I don’t actually know how much it warms the bricks up but this nearly 3 floors above the fireplace and bricks are pretty good insulators and the sensors don’t even touch the brick themselves. I don’t think its a big deal. And if the sensor does get heated, its a sign that I am wasting energy, so that would be an interesting outcome. I wonder what he wood smoke does to the anemometer and wind vane. Probably nothing.
By the way: power. Originally, I had intended to make the entire thing solar powered which of course causes quite a few design issues. Low power, sleep mode, solar chargers, all of which I had planned until I went on the roof and removed the old VHF antenna off to make space.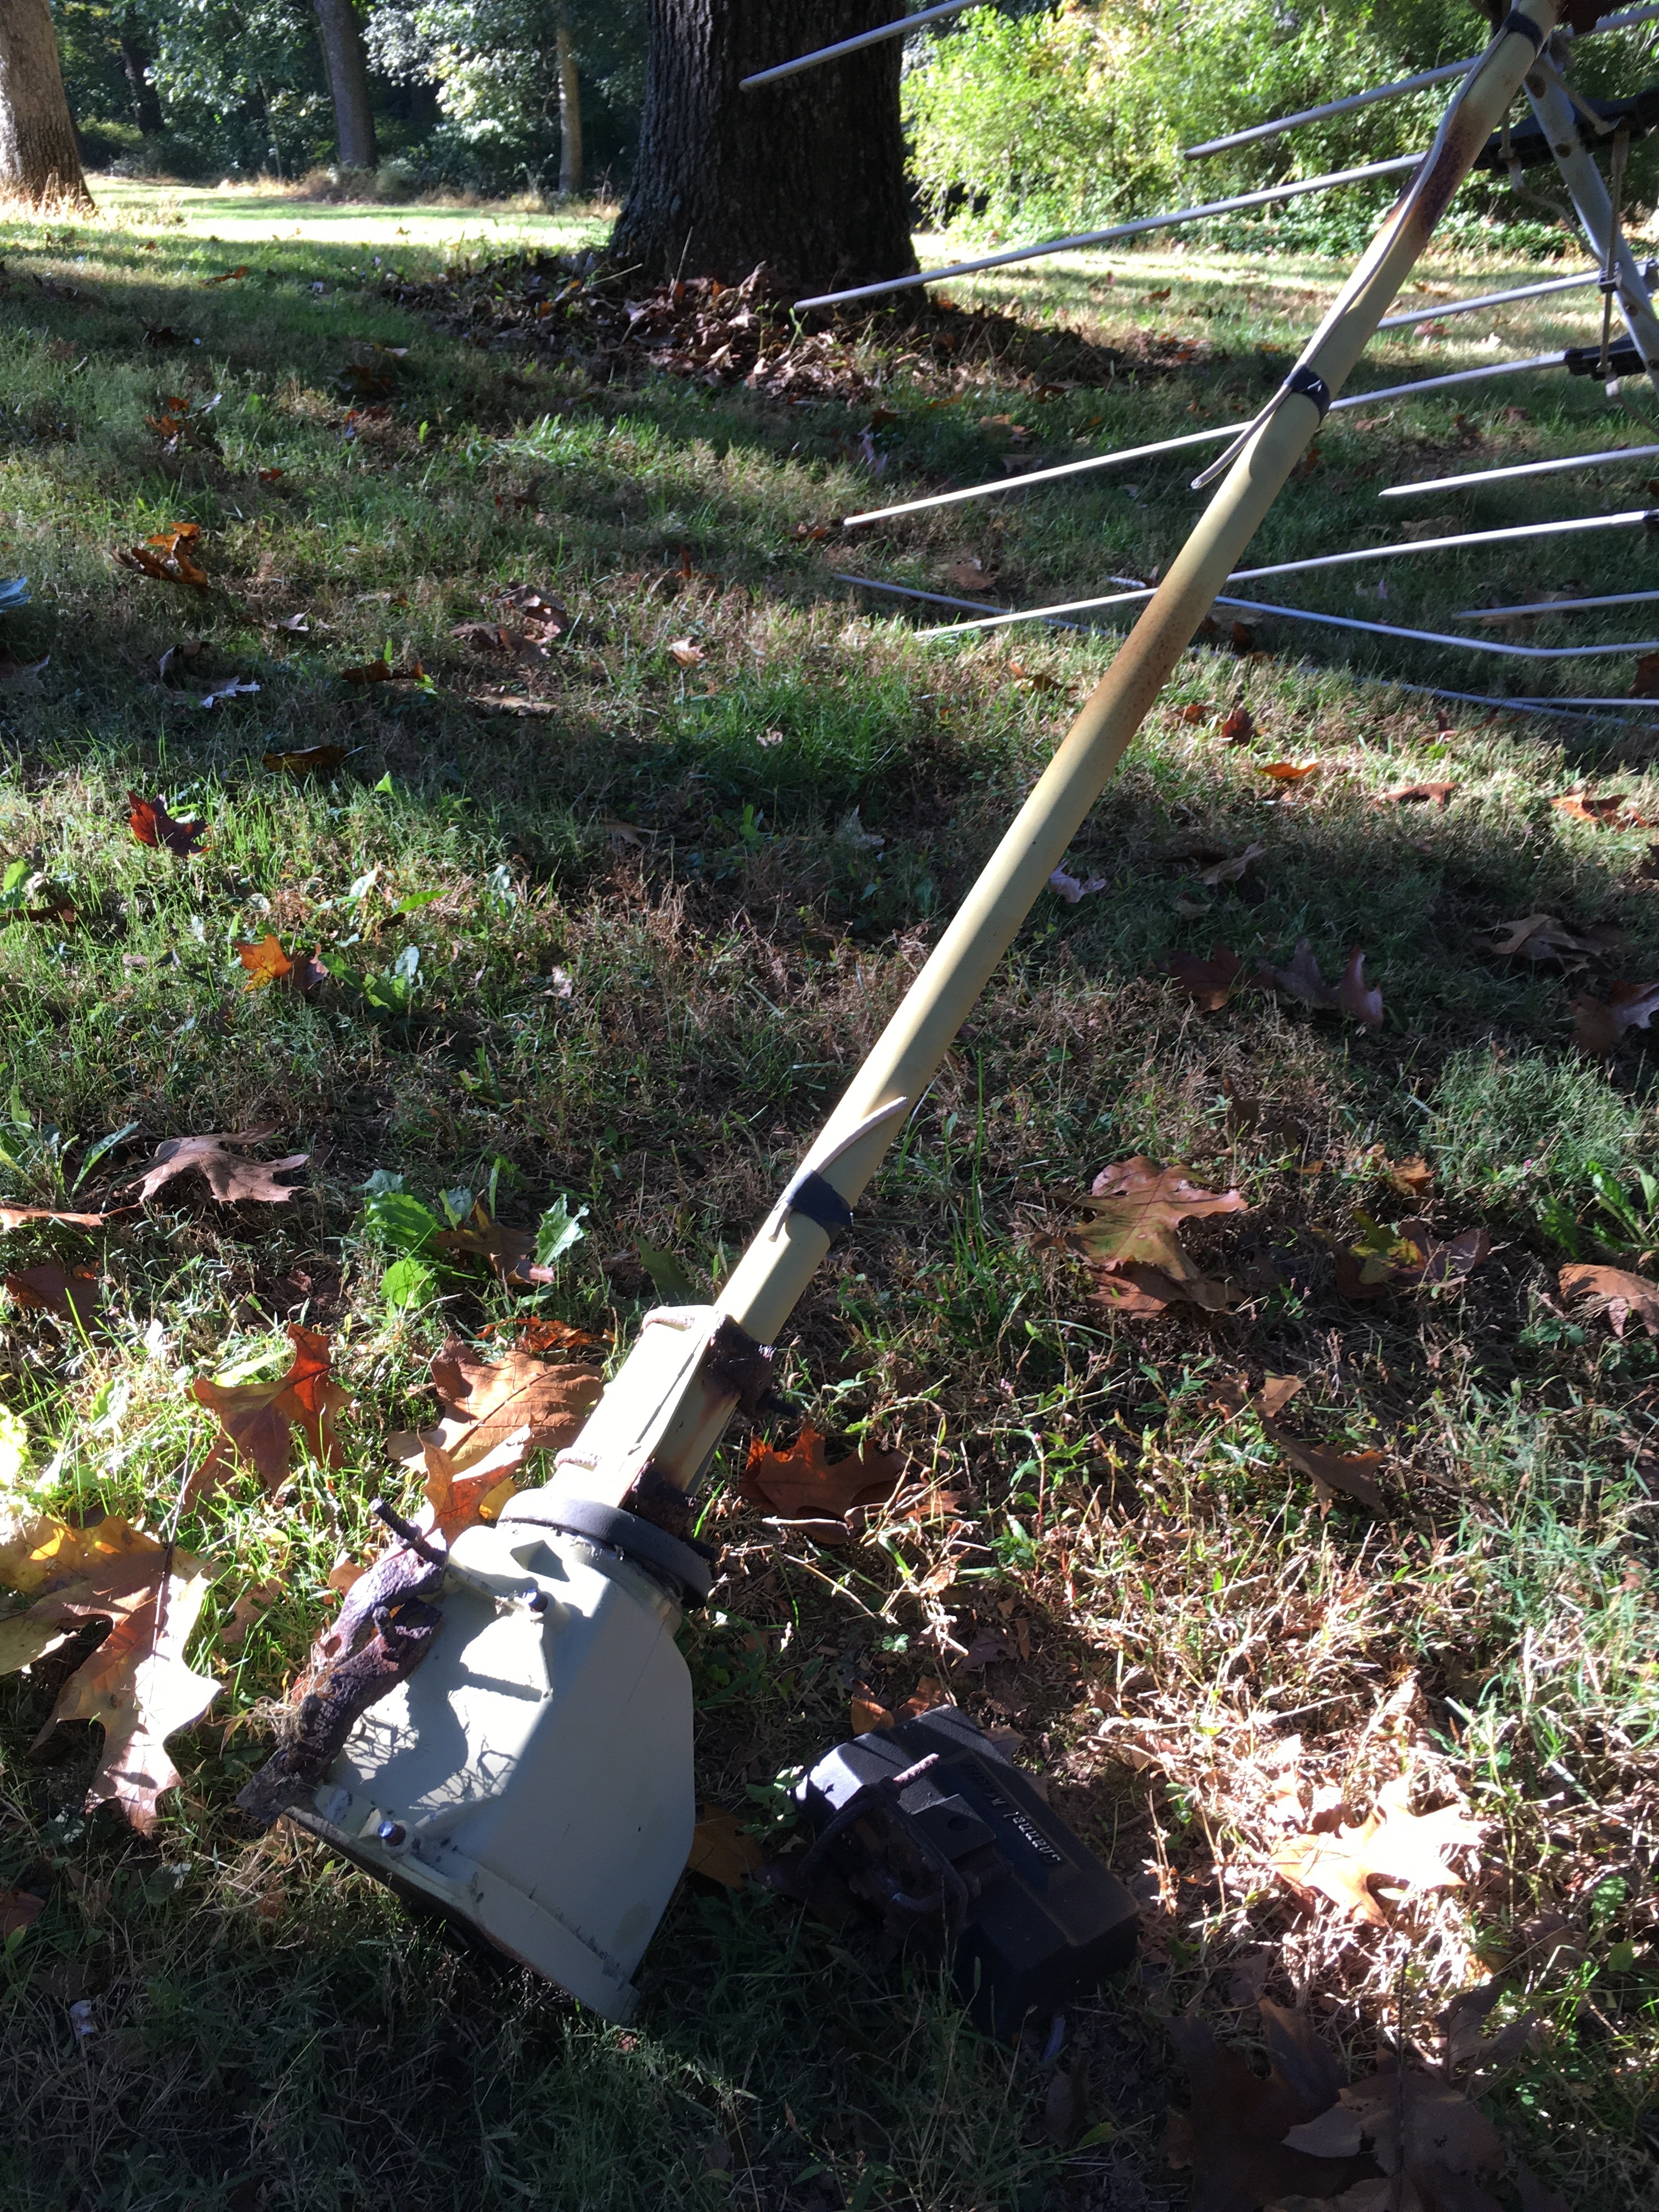
Turns out, that antenna was quite a beast for its days and had a directional motor underneath that could be controlled from a dial in the bedroom. The photo on the left shows the bottom assembly after unceremoniously sawed off the roof and thrown down.
Anyway, because of this antenna relic, it turned out that I had a 4-wire, decent gauge cable going directly from the bedroom to the chimney above it. This means, no batteries, no solar, no fancy footwork on keeping the power low. Burn, baby burn those mA, see if I care.
It also opened an interesting thought about low temperature management, in theory, I could add a small 12V heating pad inside the junction box and trigger it when things get too cold. Honestly, I don’t know how cold Arduinos can get before they die but this is something I keep in mind this coming winter.
But mostly, these old cables kept the requirements really simple for the power management. For future installs / chicken coops, vegetable gardening etc, I need to revisit the solar option but not today.
Next post, I’ll get into the Arduino per se and what it does (more so, why).